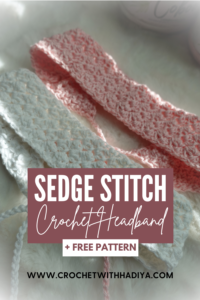
Ready to create the best summer crochet headband for this summer?
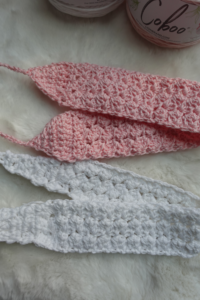
Summer is here! I am so ready for these season changes. This lightweight and shiny in-color headband is perfect for the heat.
You will learn how to make this with easy written instructions to help guide you throughout this process.
This project took me about 25 minutes to create! I bet you could make it quicker!

Disclaimer: This post may contain affiliate links to products I love and use personally. To support my journey, if you decide to click on the link and make a purchase, I may receive a small commission to help me keep making posts like this. This crochet course is for personal use only and is not to be replicated, duplicated, or sold for any reason.
Materials Needed:
Lion Brand Cotton Yarn (232yds)
Tapestry Needle – (For weaving in ends)
Difficulty Level
This headband pattern is meant for advanced beginners. This includes knowing the fundamental stitches and reading basic crochet patterns.
Additional Information
You can create this headband for many sizes using the same written pattern below. Change the beginning multiple ch’s of 3 to increase/decrease the width. Then crochet until you have the desired length.
Advice Before Starting:
- Read over the pattern to get a brief overview
- Use the recommended yarn OR same weight yarn
Technical Tips:
- The single crochet you are making in the first row is where you place the [1 sc, 1 hdc, and 1 dc] in the second row. It is not the space where the skip 2 occurs. This can be a common mistake.
- Make sure to feel out the stitches and visually look for the dc and hdc, to ensure you skipped them.

Multiples of 3 sts + 1 (add 2 sts for base chain ) = increase the multiples of 3 to widen headband, if desired.
For this project, (9 chs) + 1, then added 2 sts for base chain. Making the total 12 chs to start this product.
Round 1:
Skip 2 ch (counts as 1 sc), work [1 hdc, 1dc] into next ch, *skip 2 ch, work [1 sc, 1 hdc, 1 dc] into next ch; rep from * to last 3 ch, skip 2 ch, 1sc into last ch, turn.
Round 2:
Ch 1 (count as 1 sc), work [1 hdc, 1 dc] into 1st st, *skip [1 dc and 1 hdc], work [1 sc, 1 hdc, 1 dc] into next sc; rep from * to last 3 sts, skip [1 dc and 1hdc], 1 sc into top of tch, turn. Rep row 2.
Depending on your head measurements, you want to repeat this pattern until it comes down to the beginning of your ear (Not the flap of your ear but where it connects to the side of your head)
The Ending
There are two ways to create the ends of the headband. This part was very difficult to explain in a written pattern. So I created two versions that you can try.

The Simplistic way
You can stop the stitching design (sedge stitch) and begin a row of double crochet in each stitch. Then decrease it until it becomes a corner (or point). Create “x” of chains long enough to tie it on the back of your head. Repeat on the other side. Then you are finished.
Most Advanced
You can continue the sedge stitch design and slowly decrease by eliminating stitches on each end. Creating it to be a corner (point look) without the change in pattern. Instead of placing [1 hdc, 1 dc] inside the first stitch in a row. I eliminated the [1 hdc] and continued to do so every round until it became a point.
As crocheters, sometimes we have to wing out projects because there is no simple organized way of decreasing complex designs.
If you’d like for me to post a video on how I did this, let me know in the comments!
There you have it!
Didn’t I tell you this is the best crochet summer headband ever!? I must say, yours probably looks stunning. I hope this pattern was manageable and that you enjoy your new summer crochet headband.
Leave a Reply