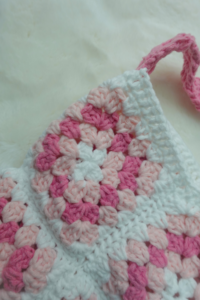
You’re probably reading this because you want to create a crochet summer bag for this upcoming heat.

Take it from me, this may be the best summer crochet bag you can make.
This is the easiest crochet summer bag pattern with easy-to-follow instructions and steps.
Disclaimer: This post may contain affiliate links to products that I love and use personally. To support my journey, if you click on the link and make a purchase, I may receive a small commission to help me keep making posts like this. This crochet course is for personal use only and is to not be replicated, duplicated, or sold for any reason.
Description of Bag
This crochet summer bag is created out of 18 granny multi-colored granny squares. Alternating sides of double crochet. Suitable to carry 10 pounds when weaved incorrectly. Easy to the skin, lightweight, durable, and perfect look for the heat.
Difficulty Level
This Crochet bag is meant for advanced beginners. You will need to know how to make a granny square, which makes up 90% of this pattern. Must know how to weave together granny squares.
Materials
Feels like Butta (or even medium size yarn)
Hook size – G6/4mm (Hook size used: F/3.75mm)
Tips before getting started
- Make sure to have the correct materials to make a pattern.
- Read over the entire pattern before beginning.
- Keep track of how many granny squares you have.
- (Optional) Make sure to have 3 colors you can alternate with … This project took 3 skeins of different colors to complete.
Let’s get started!
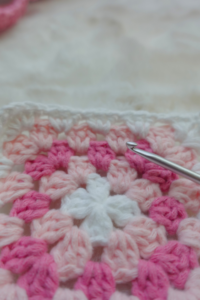
1st row (Primary color): Start with a Magic Circle, Ch 2, place dc then Ch1
***Place 3dc + ch 1
Repeat from *** two more times, then sl stitch inside the ch2 from the beginning of the row. Ch1 then cut the yarn strand. Switch colors.
2nd row (Secondary Color): Tie a knot of your secondary color inside of a ch1 space. Ch2 + 2dc inside the same space.

***Ch1 + 3dc into next ch1 space, Ch1 + place another 3dc into same ch1 space, repeat from *** two more times
Ch1 + Place 3dc into the next space (where you originally tied your secondary yarn) and Ch1, completed by placing a slip stitch.
Ch1 + cut the yarn strand.
3rd row (Third color): Tie a knot inside a ch1 space with your third color chosen.
Ch2 + place 2dc into that same space, ch1
There will be spaces of ch1’s that are not corner spaces, where you will need to place 3 double crochets in. Place 3dc into that next space before the corner piece.
***Ch1 + 3dc into next ch1 space, Ch1 + place another 3dc into same ch1 space, ch 1 place 3dc into next space that is not a corner repeat from *** two more times
Ch1 + slip stitch + ch1 then cut the yarn strand.
Fourth row (secondary color): Tie a knot of your secondary color inside of a ch1 space. Ch2 + 2dc inside the same space.
Ch1 + place 3dc in the next two regular spaces
***Ch1 + 3dc into next ch1 space, Ch1 + place another 3dc into same ch1 space, ch 1 place 3dc into next ch1 space, ch1, place 3dc into next ch1 space. Repeat from *** repeat until the end of the row
Place 3dc into the last corner piece, ch1, slip stitch, ch1, and cut the yarn strand.
Row 5 (Primary color): Tie a knot of your primary color inside of a ch1 space. Ch2 + 2dc inside the same space.

Ch1 + place 3dc in next three regular spaces (with ch1’s between each 3dc)
***Ch1 + 3dc into next ch1 space, Ch1 + place another 3dc into same ch1 space. Ch1 + place 3dc in the next three regular spaces (with ch1’s between each dc) Repeat from *** repeat until the end of the row
At the end of that 3dc, ch1, place 3dc into the last corner piece, ch1, slip stitch, ch1, and cut the yarn strand.
You want to repeat these steps 17 more times, for a total of 19 granny squares. This will create a medium size bag, perfect for books, wallets, etc.
Last steps:
We want to now weave together the sides of all the granny squares (3×3 granny squares)
One side should have 3 granny squares topped on top of one another, a total of 9 granny squares.
Once you weave in the granny squares to make a rectangle of 9 granny squares (both sides) you want to weave in the sides to make them both attach with no holes/gaps. This creates the cavity(opening) of the bag.
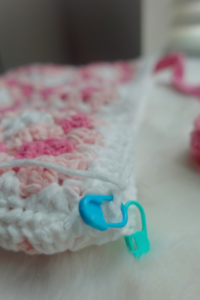
You then want to attach one of the colors to the side of the bag, begin crocheting 4dc, ch2, turn your work, and go back and forth until you get the desired length of your strap. That’s it!

You can place stitch markers to determine how thick you want your strap to be. In this case, I only created 4dc as my strap width.
Customizations
At this point, you can make the strap long, medium, or short. You can also add lining to the inside of the bag. This is completely optional and is not needed.
Care Instructions
You want to make sure depending on the yarn you used, that you follow the care instructions on the label.
This post was all about how I made a crochet summer bag in 5 simple steps.
Leave a Reply