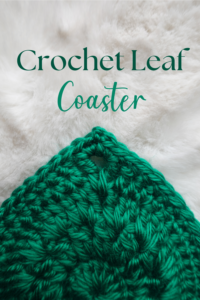
Today I am going to show you the easiest crochet leaf coaster pattern that you can create in less than 15 minutes.
Disclaimer: This post may contain affiliate links to products I love and use personally. To support my journey, if you decide to click on the link and make a purchase, I may receive a small commission to help me keep making posts like this. This crochet pattern is for personal use only and should not be replicated, duplicated, or sold for any reason.
Level of Difficulty:
This should be relatively easy for advanced beginners. Below I attached the primary crochet terminology for you to read and reference.
Abbreviations Included:
Ch – chain
SC – single crochet
HDC – half double crochet
DC – double crochet
TR – treble crochet
Spaces – in between the posts
YO – yarn over
Sl st- slip stitch
Special Abbreviations:
DC2TOG – YO, insert hook, pull up. A loop, pull up two loops (2 loops remaining) YO again, insert hook into same stitch, pull up a loop, pull up 2 loops (3 loops remaining) Pull up two loops, pull up two loops again, ch1
Materials Needed
This crochet leaf coaster pattern should be created with the following material:
- Acrylic or Mercerized Cotton Yarn
- Clover 5mm crochet hook
- Scissors
- Tapestry Needle
I will show you 5 easy steps in this crochet leaf coaster pattern. You can create it in any color you like. I created it using a deep green color perfect for this crochet leaf coaster project.
Crochet Leaf Coaster Pattern
Row 1
Magic Circle (ch2+15DC)
Sl st into 2nd chain of ch2
Row 2
Ch2 + 1DC in same stitch + ch1
DC2TOG in the next stitch (repeat for every stitch)
Sl st inside top of chain 2
Row 3
Sl st into the chain 1 space + ch1
3SC in ch1 space
2SC + 1HDC in the next ch1 space
2HDC + 1DC in next ch1 space
3DC into the next 4 ch1 spaces
2DC + 1TR in next ch1 space
1TR + 2DC in next ch1 space
3DC into the next 4 ch1 spaces
1DC + 2HDC into next ch1 space
1HDC + 2SC into next ch1 space
Row 4
SC for 21 stitches
1HDC into the next stitch
1DC into the next stitch
1TR in next space + ch1
1TR in the same space
1DC in the next stitch
1HDC in the next stitch
SC in remaining stitches
Row 5
SC for 24 stitches
2SC in space + ch2
2SC in the same space
SC in remaining stitches
Sl stch inside beginning of last SC + ch1, fasten off!
Is this customizable?
This project is completely customizable in a few different ways. You can change colors within any row of this project. A beautiful rainbow crochet leaf coaster would be gorgeous as a customization. Also with this project, you can add a beautiful border which I left out to make it customizable for you. With this crochet leaf coaster, you can also add a leaf tail end.
Is Blocking required?
Blocking is highly recommended after completing this project. You can use any blocking tools to complete this last finishing step or place it into the middle of a heavy book. Make sure the book is heavy enough and your crochet leaf coaster is lying flat before closing.
Is Weaving in Ends Necessary?
I would prefer to weave in my ends so it can have that finishing touch/look. Click here for tips on how to weave in ends for your crochet leaf coaster.
You Completed it!
Now you know how to create a beautiful crochet leaf coaster for decor or as a gift. As I mentioned, this crochet leaf coaster has many different ways of customization and finishing optional touches. When you finish with your crochet leaf coaster, feel free to comment below and/or tag me on Instagram @Crochetwithhadiya!
Leave a Reply